It Started With A Stench
For years, every time we reached in to our utensil drawer above the refrigerator, or pulled open the large drawer below, our nostrils were assaulted by the unmistakable scent of mold.

Attempts to purge the offending odor with vinegar, then bleach, had no effect. We learned to live with it, begrudgingly. Then the leak started. We’d find yellowish-orange puddles on the galley floor, leaching from the cabinets surrounding the refrigerator and freezer.
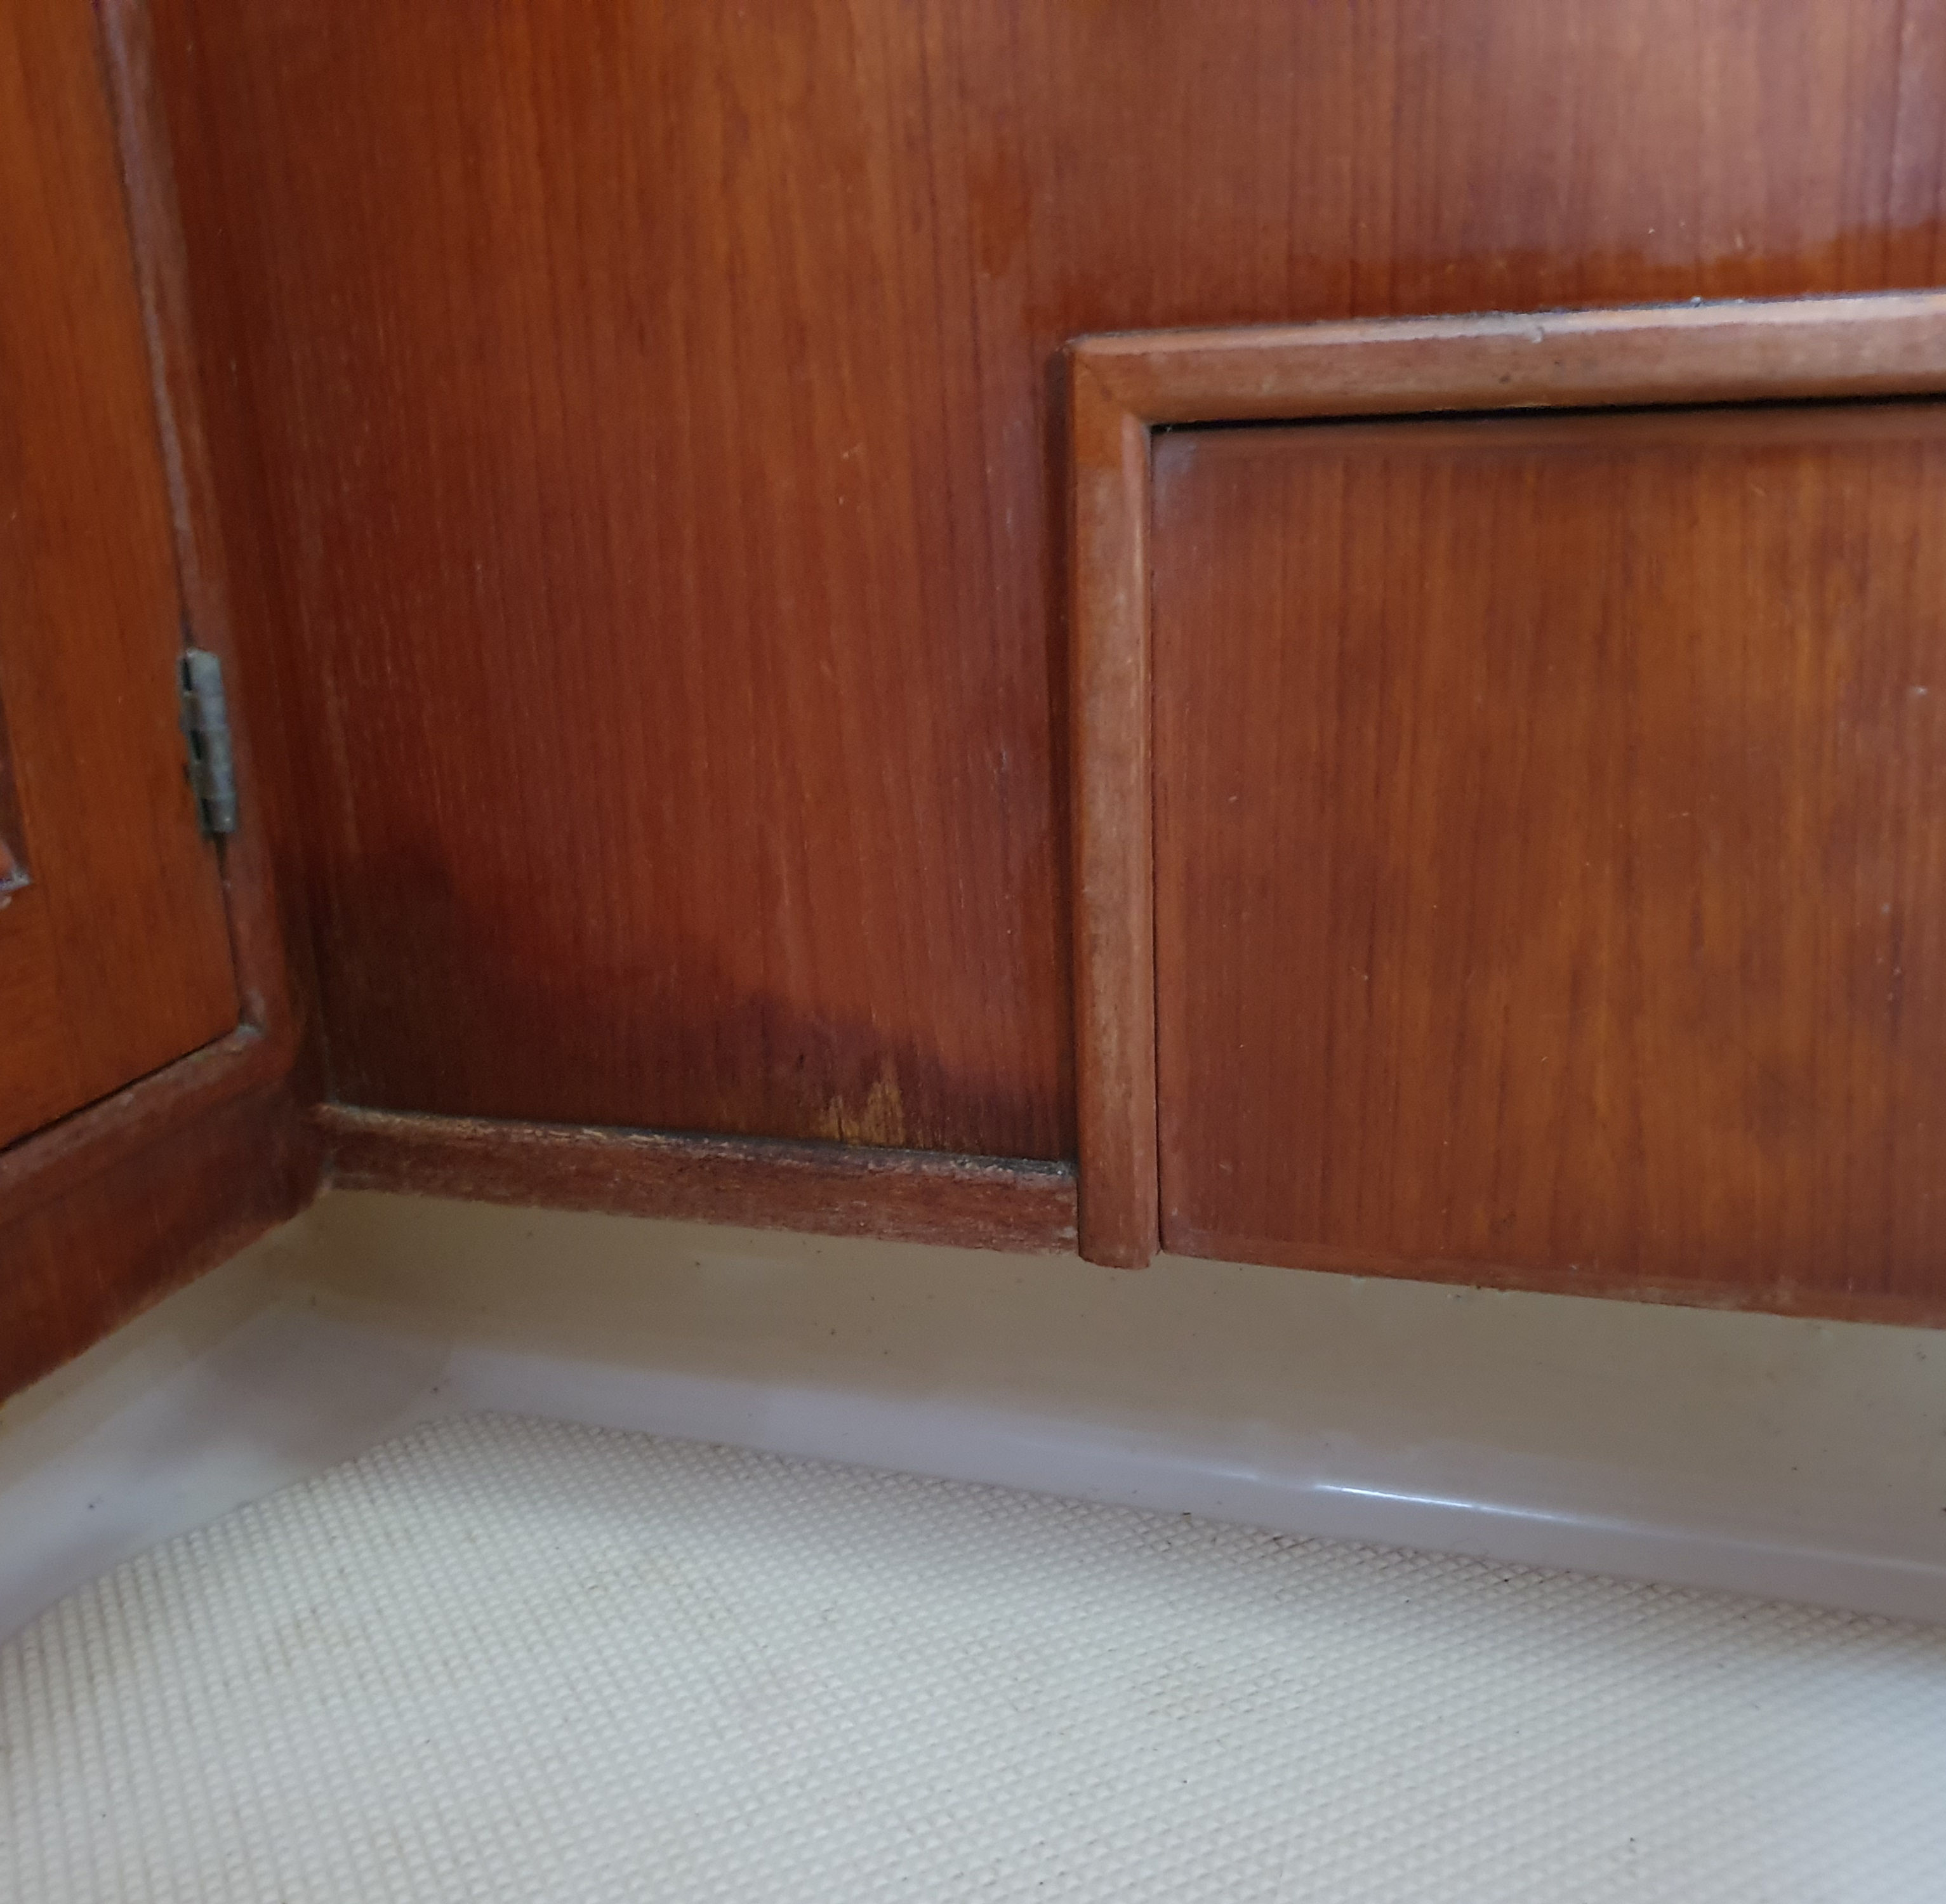

Then came the mold. The wooden wall inside the lower cabinet, abutting the freezer, grew a fuzzy layer. It was this that made us decide an intrusive investigation was necessary. This would be no gentle survey. Island Packet sailboats are born for battle. Everything onboard is built-in to last. The materials are heavy and thick, and they are secured with more screws and more industrial adhesive than you would ever imagine is necessary for a pleasure craft. Destruction would be required.
We did not want to do this at a remote location, so after completing a magical season in the San Blas we arrived to Linton Bay Marina prepared to cut into our boat. To our knowledge, no IP owner had ever removed the wooden wall that fronts the refrigerator to take a peek inside. What wonders would await us?? The first order of business was to acquire new power tools, making one of us extremely happy. An angle grinder and small circular saw made easy work of cutting an opening in the wall.

Removing the panel was more of a challenge. We discovered the entire compartment surrounding the cooler box was filled with spray foam. Spray foam is an excellent adhesive, as it turns out. We needed a crowbar to pry the wood from the foam.

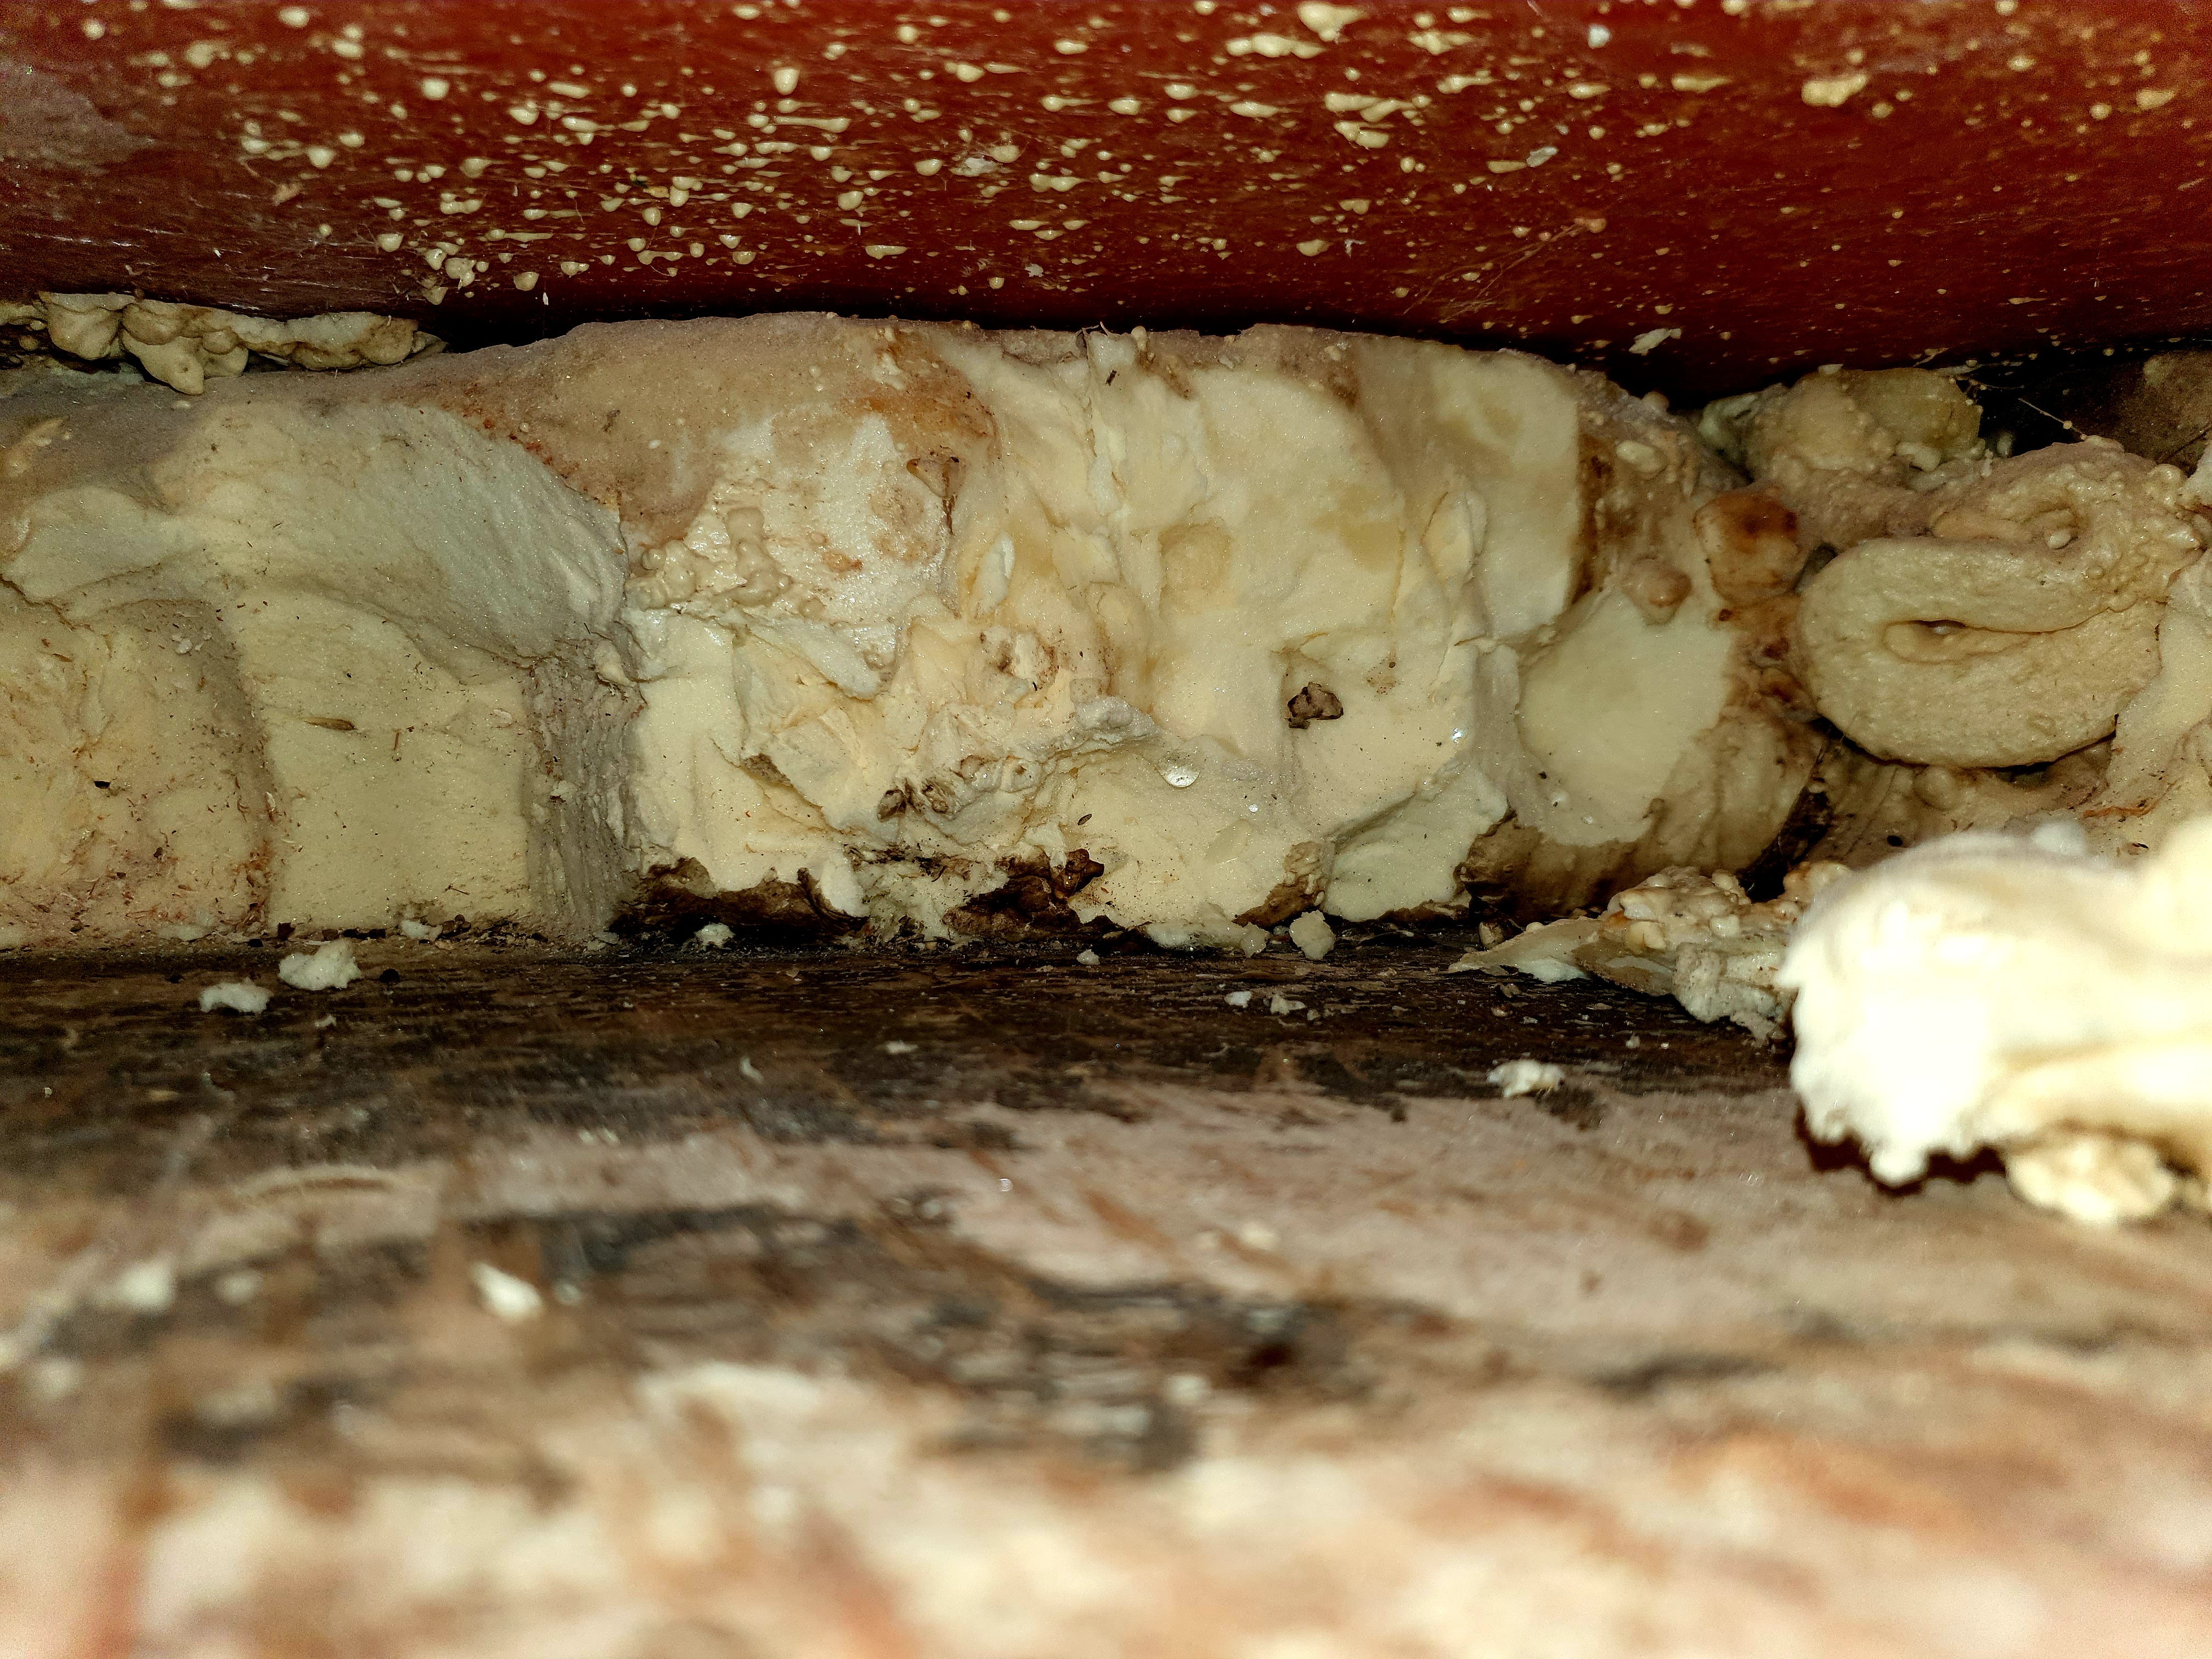
Another thing we learned about spray foam is that it is very absorbent. Within seconds we discovered the source of the smell and the puddling water. The foam was soaked. And there was a LOT of foam.

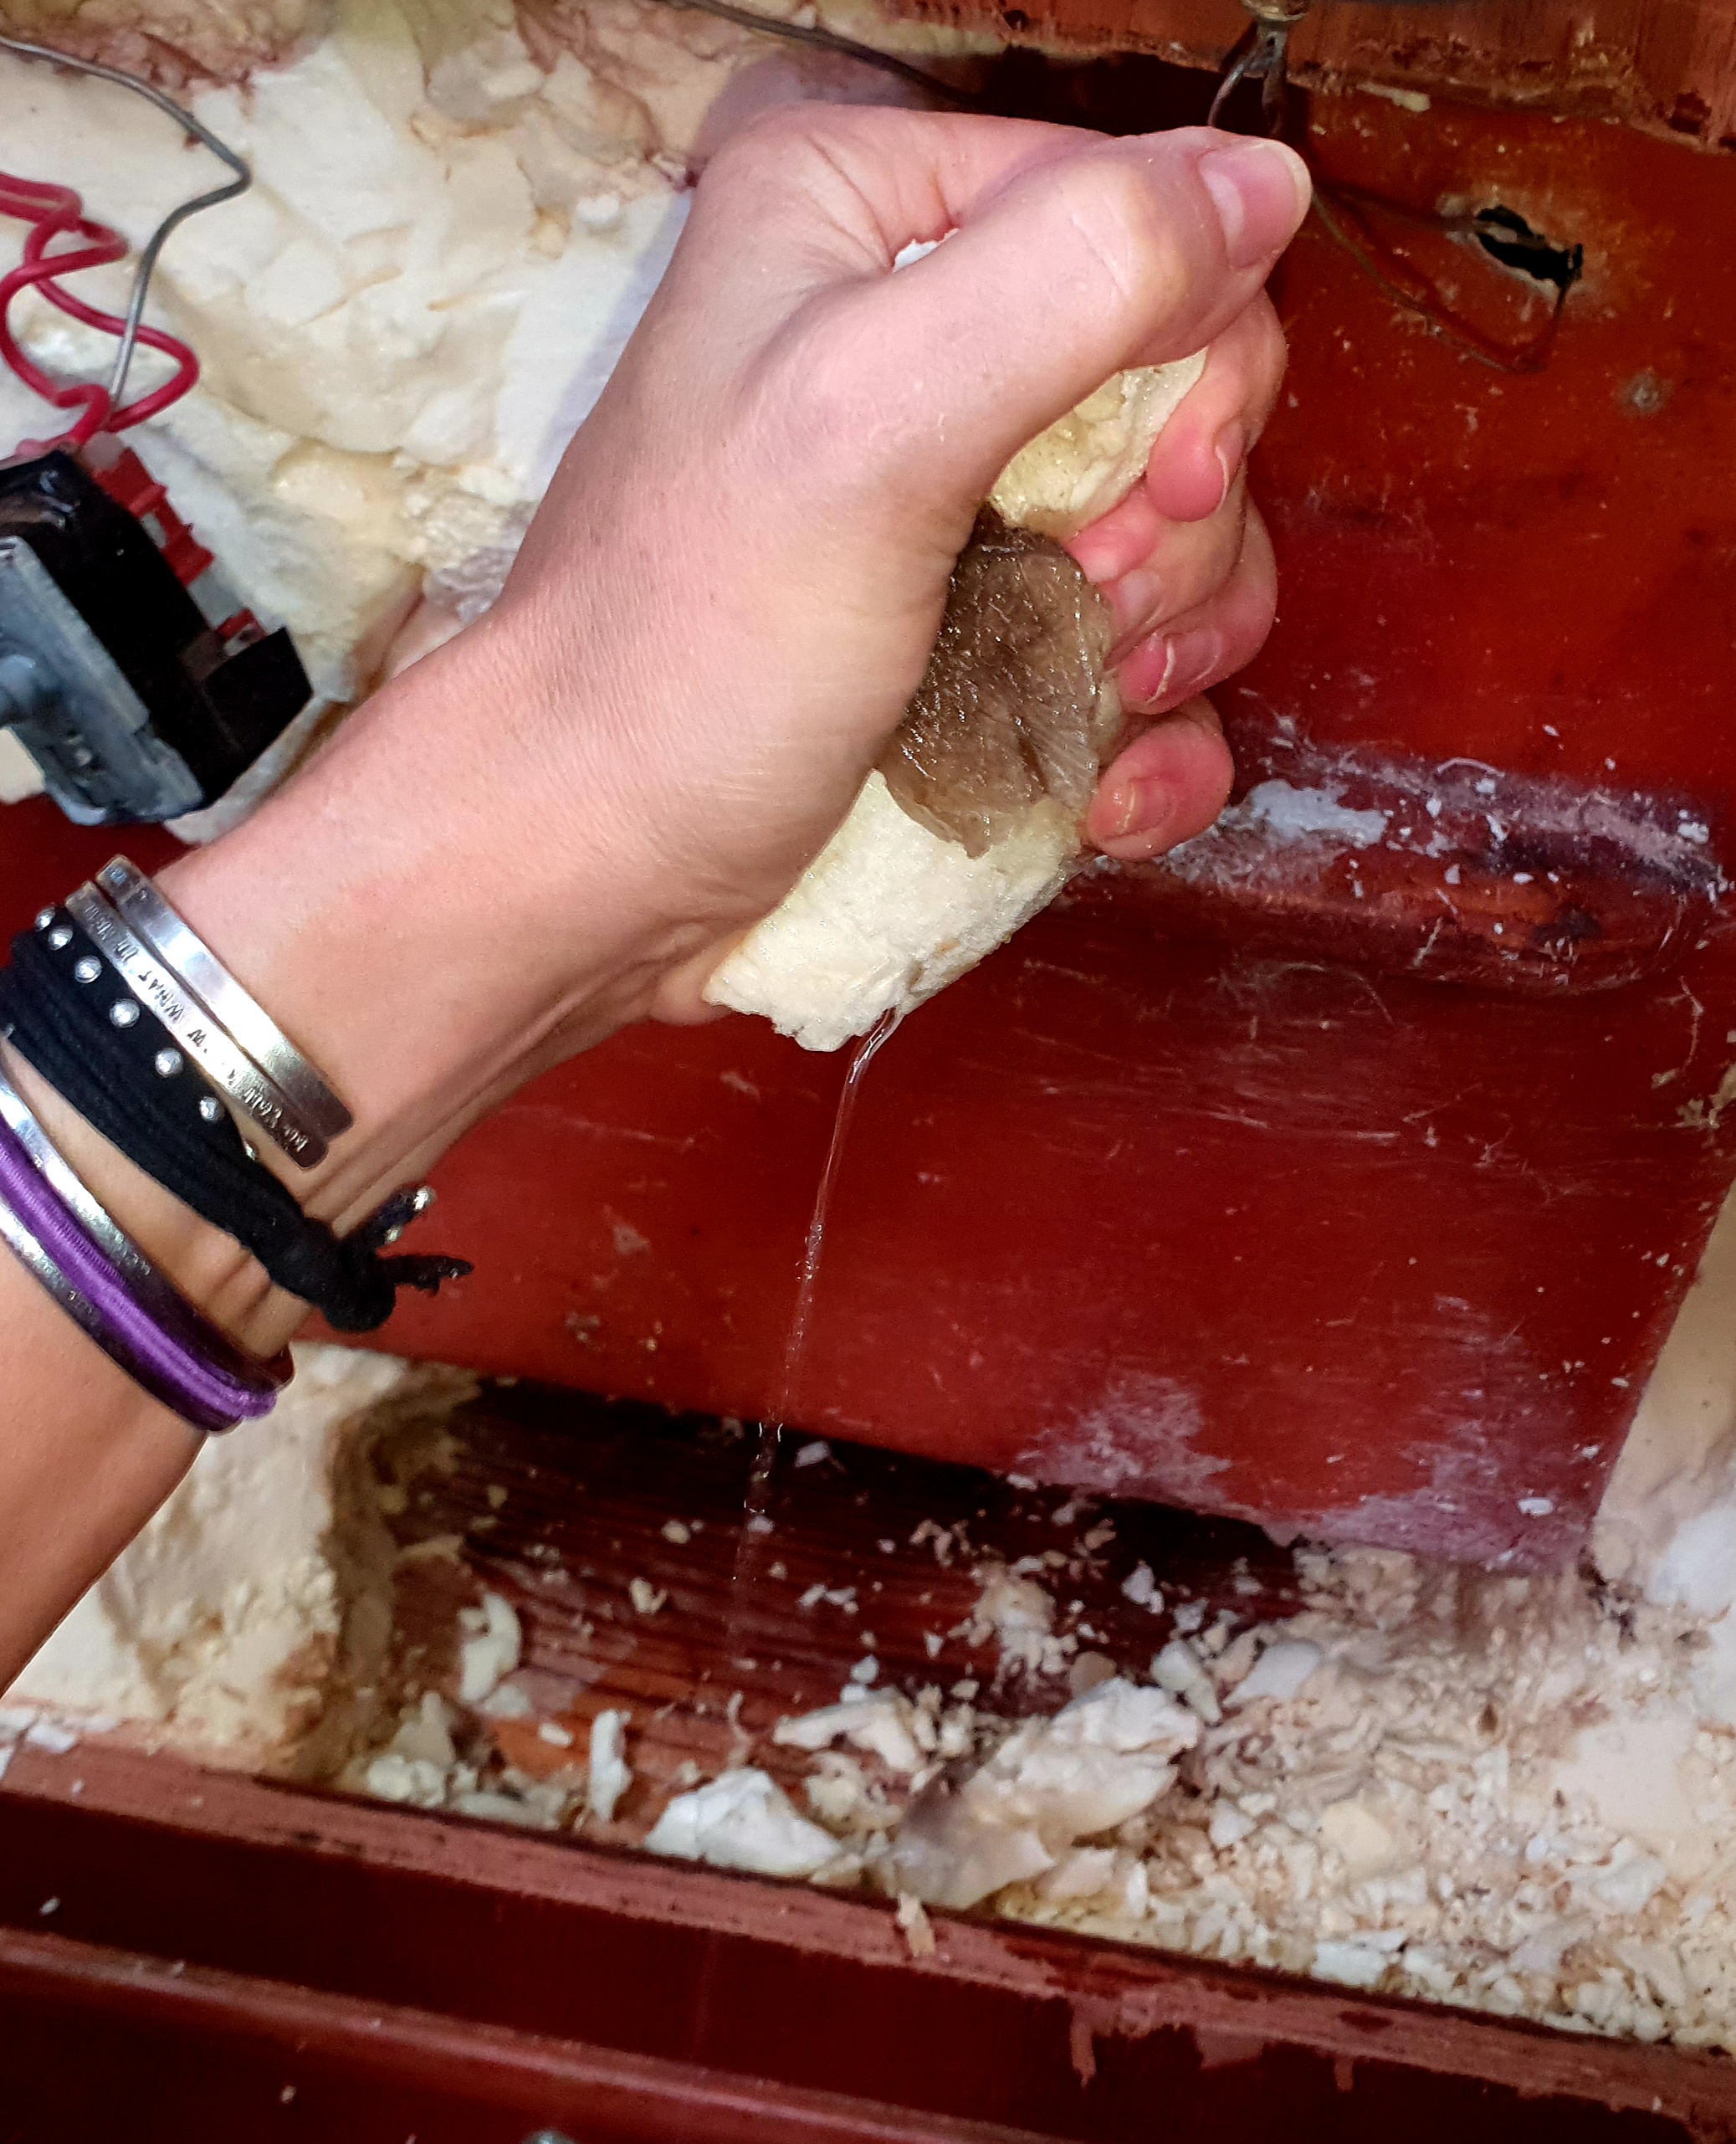


It turns out that, over twenty years, condensation in the completely enclosed space, with absolutely no evaporation possible, had simply settled into the sponge-like foam until it was drenched and moldy. After saturating the foam, it started to leak through the bottom of the wood cabinet, into the below drawer, and onto the floor.


Plans Change
Our plan at this point was to remove as much of the foam as possible, figure out a better way to insulate the cooler box, and find a way for condensation to drain. John-Michael had recently tweaked our Sea Frost freezer bits to perfection. He installed a new compressor and, using special gauges, fine-tuned the freon levels until our freezer sang for us. For the first time in years I wasn’t regularly throwing out spoiled food. We had every intent of keeping this system. But as we chiseled away at the hard, wet foam, we realized just how enormous the space was. Surprisingly little of it was taken up by the actual cooler box.

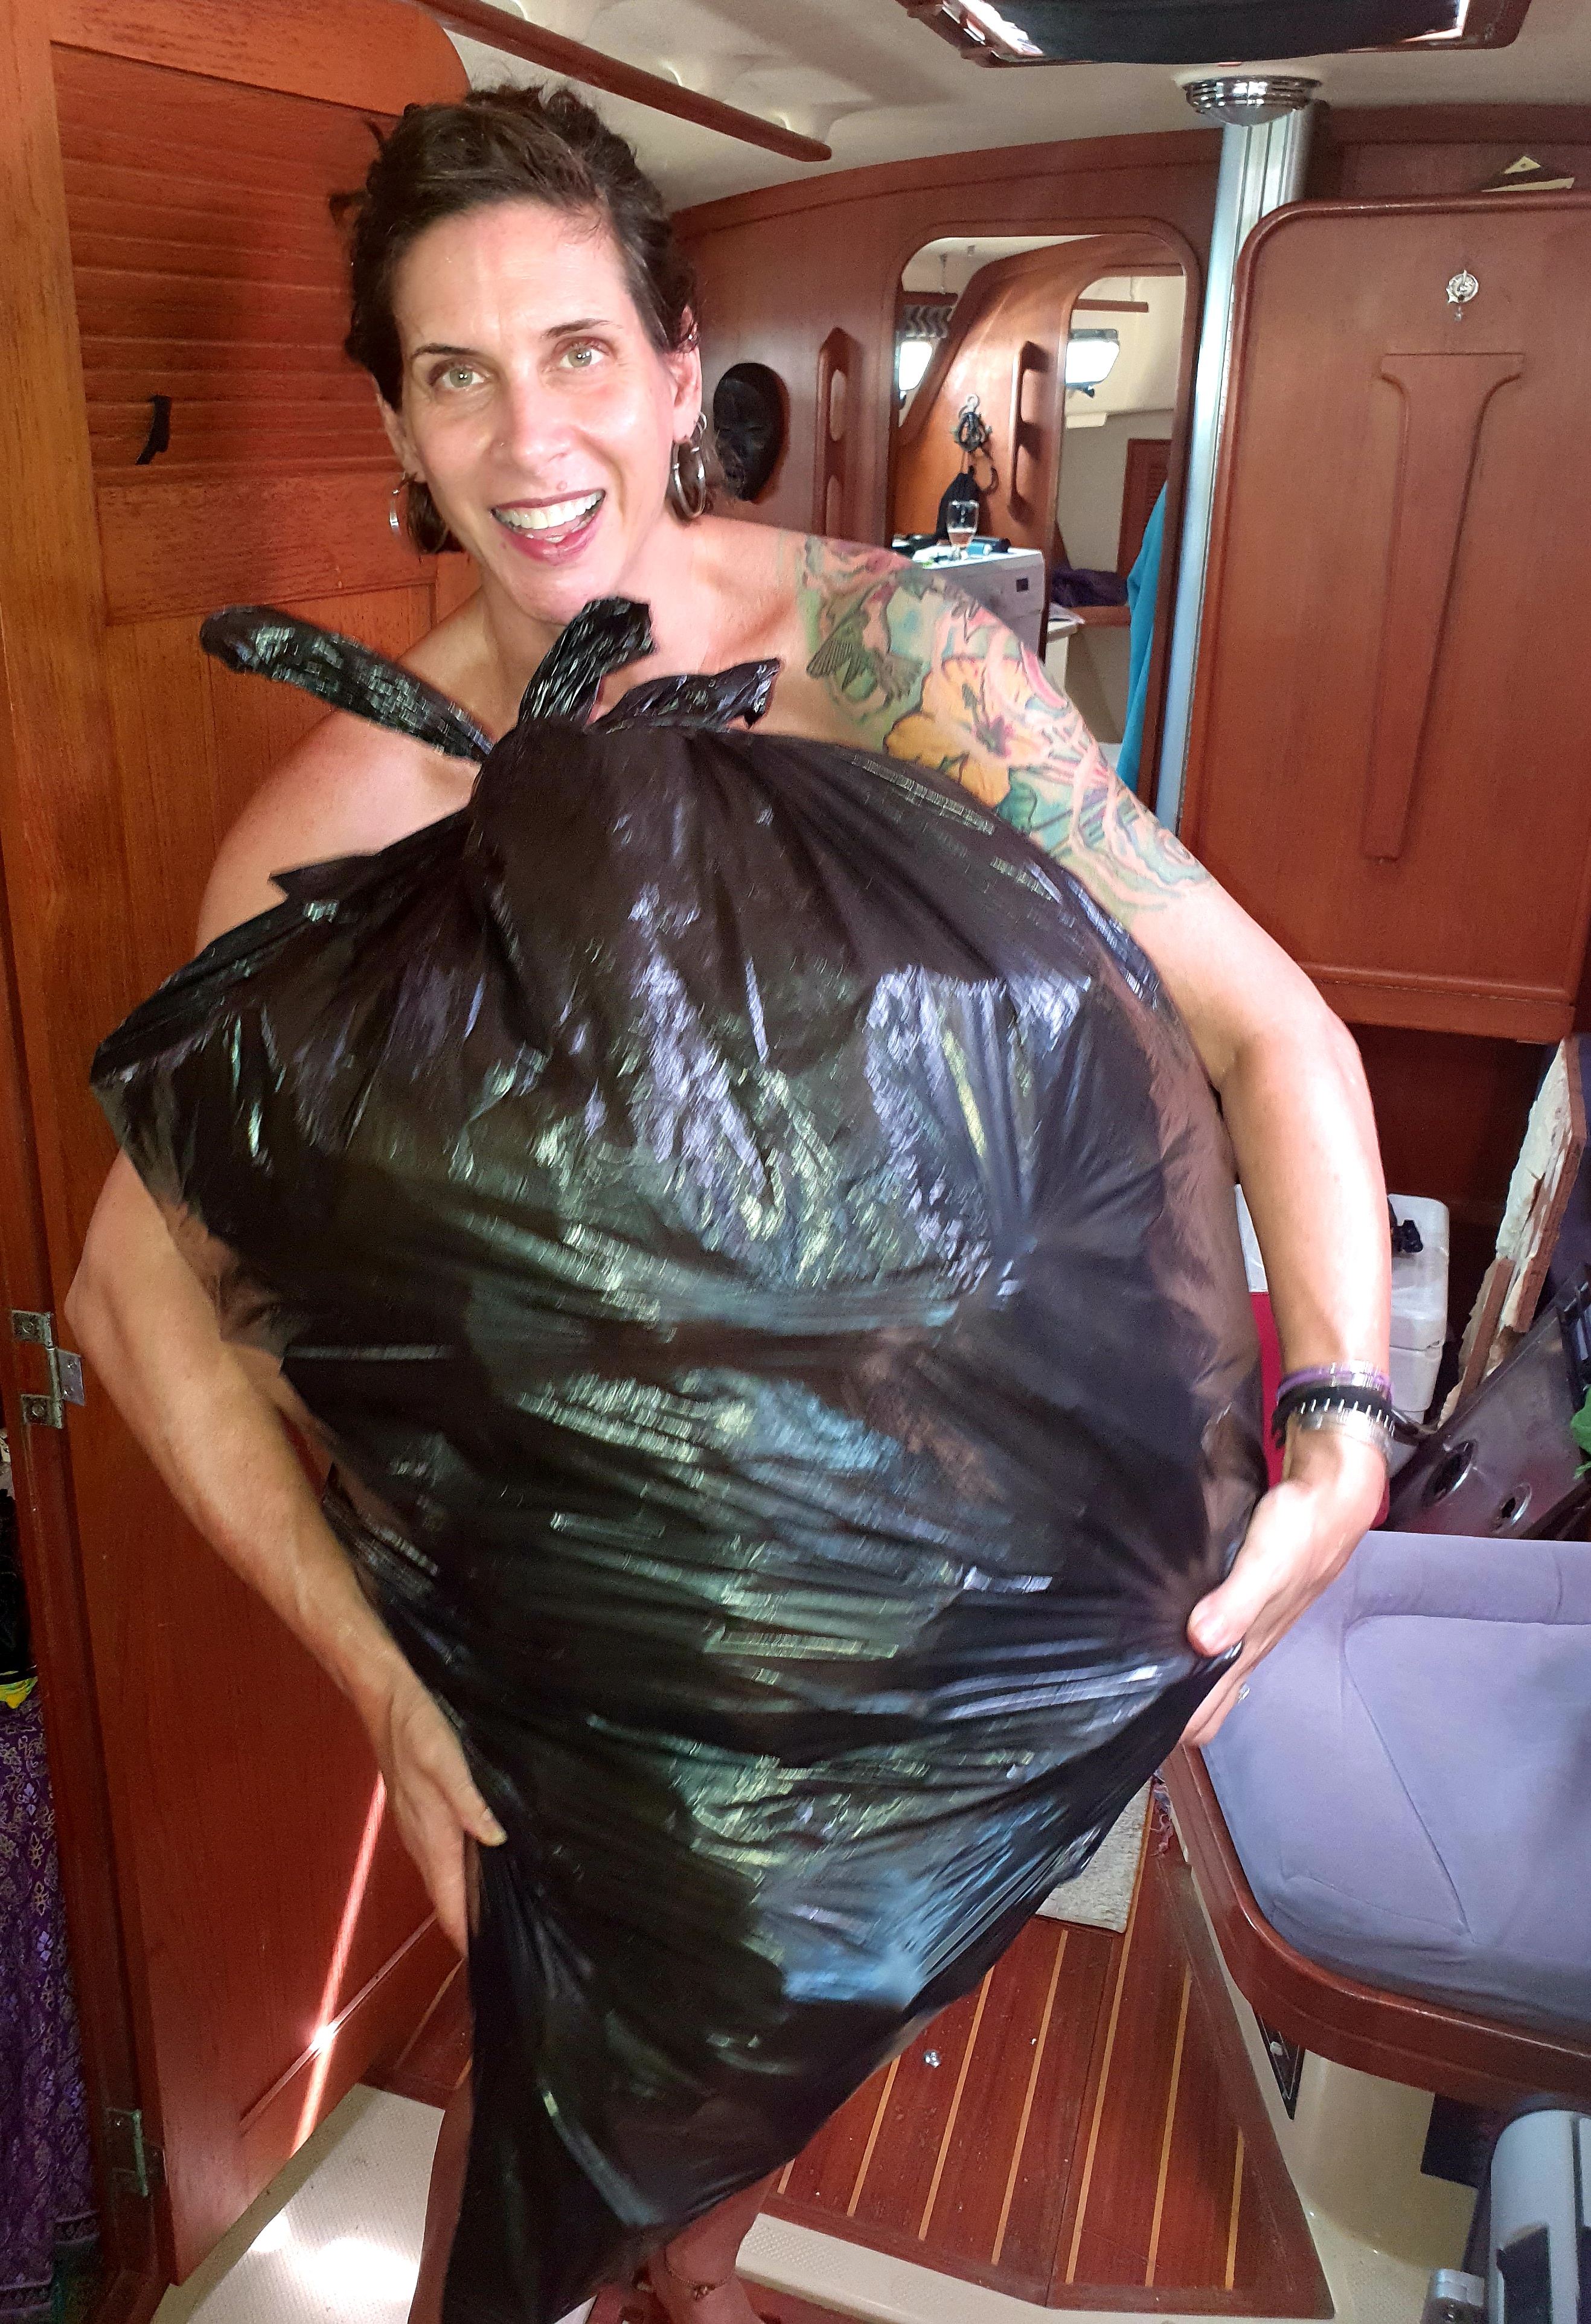
By the time we had filled four of the largest trash bags you can find with old foam, and realized we couldn’t reach far enough to dig out the rest (four bags did not contain even half of it), we had formulated a new plan. Despite our new compressor and singing freezer, we knew it was time for a completely different refrigeration system.
Knowing we would be without a fridge for the duration of this project, the first order of business was to buy a new portable cooler that would act as our refrigerator for the time being, and be our freezer later on. Taking a cue from my friend, and fellow IP420 owner, Ashley, we opted for a Dometic that would live under our nav station from that time on in the place of the built-in seat. (Getting rid of that never used nav chair made us both so happy!) When our new cooler arrived, we emptied the fridge and freezer and got to work on demolition.

Go Big Or Go Home
Before we even demolished the fiberglass fridge box we could tell there was a lot of room surrounding it. We wanted the largest refrigerator possible to squeeze into the area. In between demo days, I spent time researching DC powered refrigerator possibilities.

We knew we wanted a front opening fridge, the key was to find one that fit. I felt like Goldilocks. Most of them were either enormous or woefully undersized. Some had the perfect external dimensions, but had internal compressors that would eat into the food storage space. We had all the width and depth needed for almost any brand and model. The issue was the height. We couldn’t go taller than the existing countertop without interfering with the built-in drawers behind it. The space was so large I just knew there had to be one out there that would fit AND have enough room inside for all our chilled wine bottles.
Introducing The FC4
After measuring probably twenty times, and checking and rechecking the dimensions online, I finally found the one. Frigonautica, an Italian company that, as the name implies, specializes in boat refrigeration systems, had a model that not only met our height requirements within half an inch, it also had the largest internal area that I had come across (130L). And it was drawer opening! Better yet, it came with TWO drawers – one specifically advertised with a photo of wine bottles, standing tall, inside! (By the way, the FC4 is only a refrigerator, not a fridge/freezer combo.)
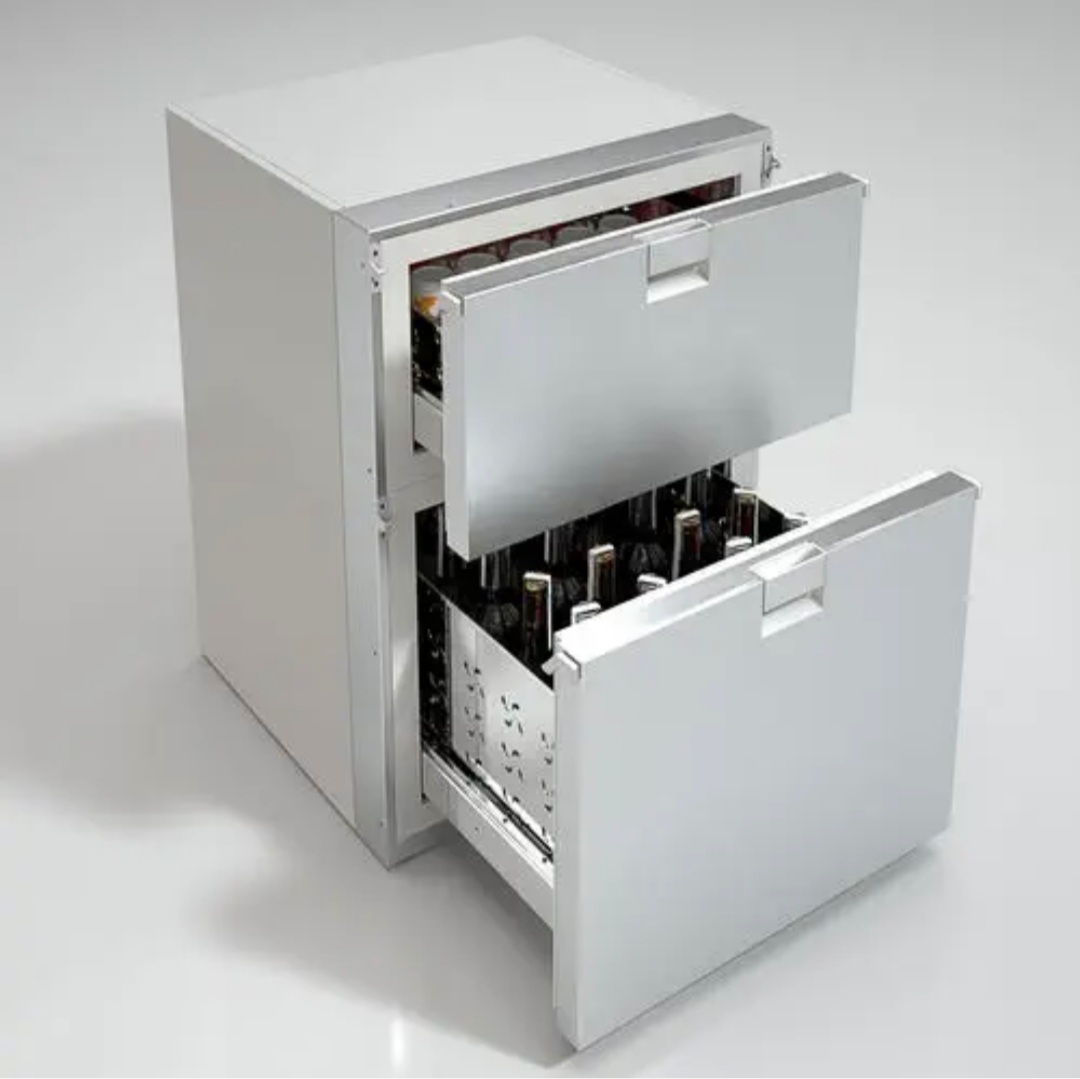

I emailed the company in Italy who immediately put me in touch with Fabio at Indel Webasto Marine, their distributor in Florida. A day later, our purchase was on a delivery truck to our freight forwarder in Miami. A couple weeks later it made it to Panamá by ship and cleared customs, via our favorite courier, Aereo Carga.
Blood Sacrifice Required
The only thing we had left to do before installing our new baby was to cut out the old fiberglass refrigerator box. There is nothing nice about cutting fiberglass. We knew it would be a messy job, and it was. It required a series of cuts using power and hand saws; our trusty crowbar; a couple of bloody knuckles; and a boat full of fiberglass dust despite attempts to contain the particles to the galley.


We itched for days even though we wore protective suits. We did the job, removed and threw away all the plastic sheeting and Tyvek suits, then realized we had missed a section. Apparently two bloody knuckles was not a sufficient offering to the boat gods.
Don’t Rock The Boat!
We inadvertently chose one of the windiest, waviest days to bring the beast onboard. ¡Pura Vida! was rocking left and right in her slip. We fretted over how to pass the fridge from the pier to the boat without tossing it to Poseidon. Thankfully, help showed up just as we were offloading it in the parking lot. Chris, a sailor with a boat on the hard at our marina, offered to assist us. I don’t know what we would have done without him. He even took the empty box to the dumpster! Chris, if you are reading this, thank you again!

Installation Day
Wiring was easy. We connected the new wires to the line from the old system. It was way bigger gauge than needed but that’s not a problem. The FC4 comes with a condensation drain pan installed inside and underneath, and a spout with a barbed fitting for that condensation to escape. No more soggy spray foam! All we needed was a hose and a path for said hose to the bilge.

We cut a hole in what once was the back of the wooden box that housed the large, moldy drawer under the cooler. Inside the cockpit lazarette John-Michael cut another small hole, and we cursed repeatedly as we tried to fish the curling hose through that dark, short space between the two compartments. From the lazarette, John-Michael pushed the other end of the hose to port and forward, underneath the engine exhaust hose.

In the spare cabin, the hose emerged into the aft engine compartment under the mattress. I was able to grab it as it came through and pass it into the rear part of the bilge where we made sure to tie it away from the engine shaft.
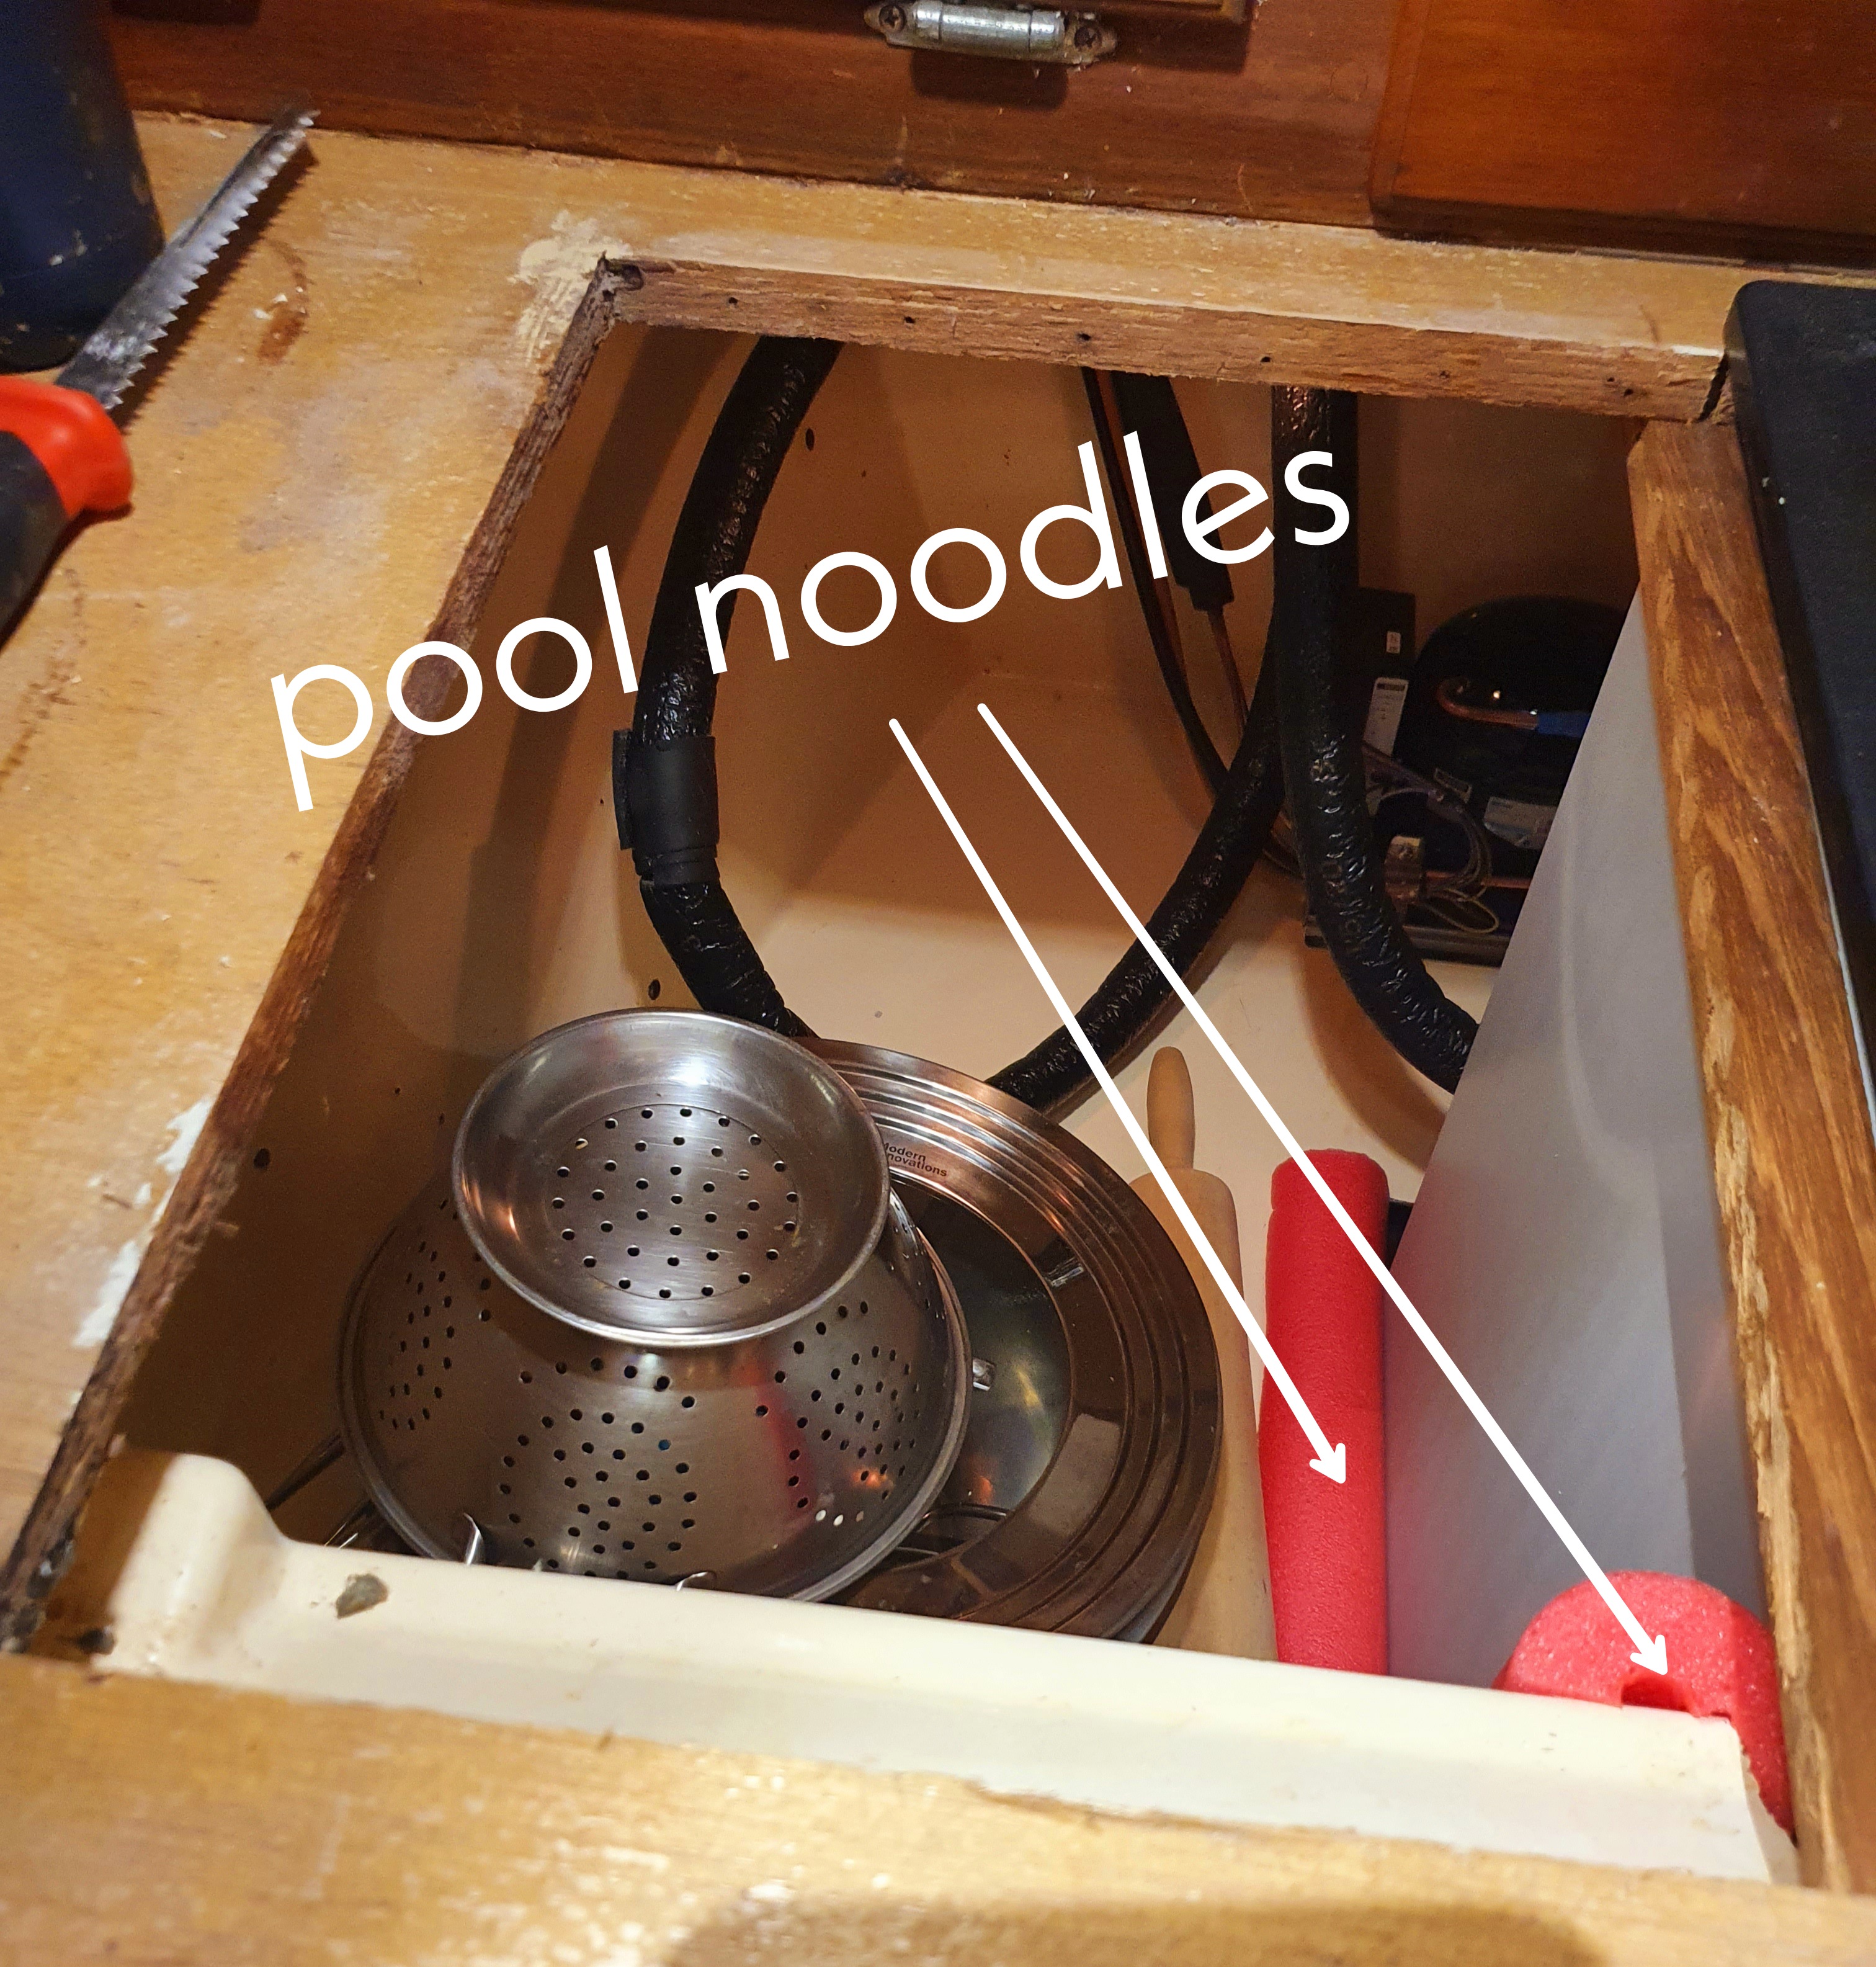
We left a flat section of fiberglass in the back of the old refrigerator box to mount the compressor. The compressor needs air flow, so we cut a piece out of the formerly fuzzy cabinet wall for the intake, and left the old hole that once served as a passthrough for the freon lines (from the cooler box to the old compressors in the cockpit lazarette) for the outflow. Inside the lazarette John-Michael installed a fan from one of the old compressors to help pull air through.


We left the area under the old freezer box open to funnel the airflow, and put pieces of a foam pool noodle to the left of the new fridge to minimize air escaping there. We left open space behind the new refrigerator, between it and the new compressor, for the air flow to continue up to the compressor.


From there the warm air should be sucked out into the lazarette by the newly installed fan. Time will tell if this is enough to cool the system. It is certainly no worse off than the two old compressors that were side by side in the enclosed lazarette, sharing each other’s heat.

The last step before sliding the fridge in place was to screw in some brackets that will keep it secure in heavy seas. We repurposed old pieces of wood from the demolition for this. We were left with lots of reusable wood and hardware that will find other uses onboard. (Hey, hanging lockers, get ready for some new shelves!)


We Should Have Chilled Some Bubbles!
The rest was so easy it was almost boring. The fridge slipped perfectly into place while I ensured the gas lines to the compressor did not get bent or smashed.

We turned the dial to the highest setting (This one goes to 7!) and waited for the temp to drop. In minutes it was cold enough to start chilling a bottle of wine. Even better news awaited when we checked the power consumption. At max power, the new fridge was only drawing 4 amps. That is about half of the power consumption of the old fridge (not even counting the freezer). When we are off the grid and relying on solar for energy, this will make a huge difference.
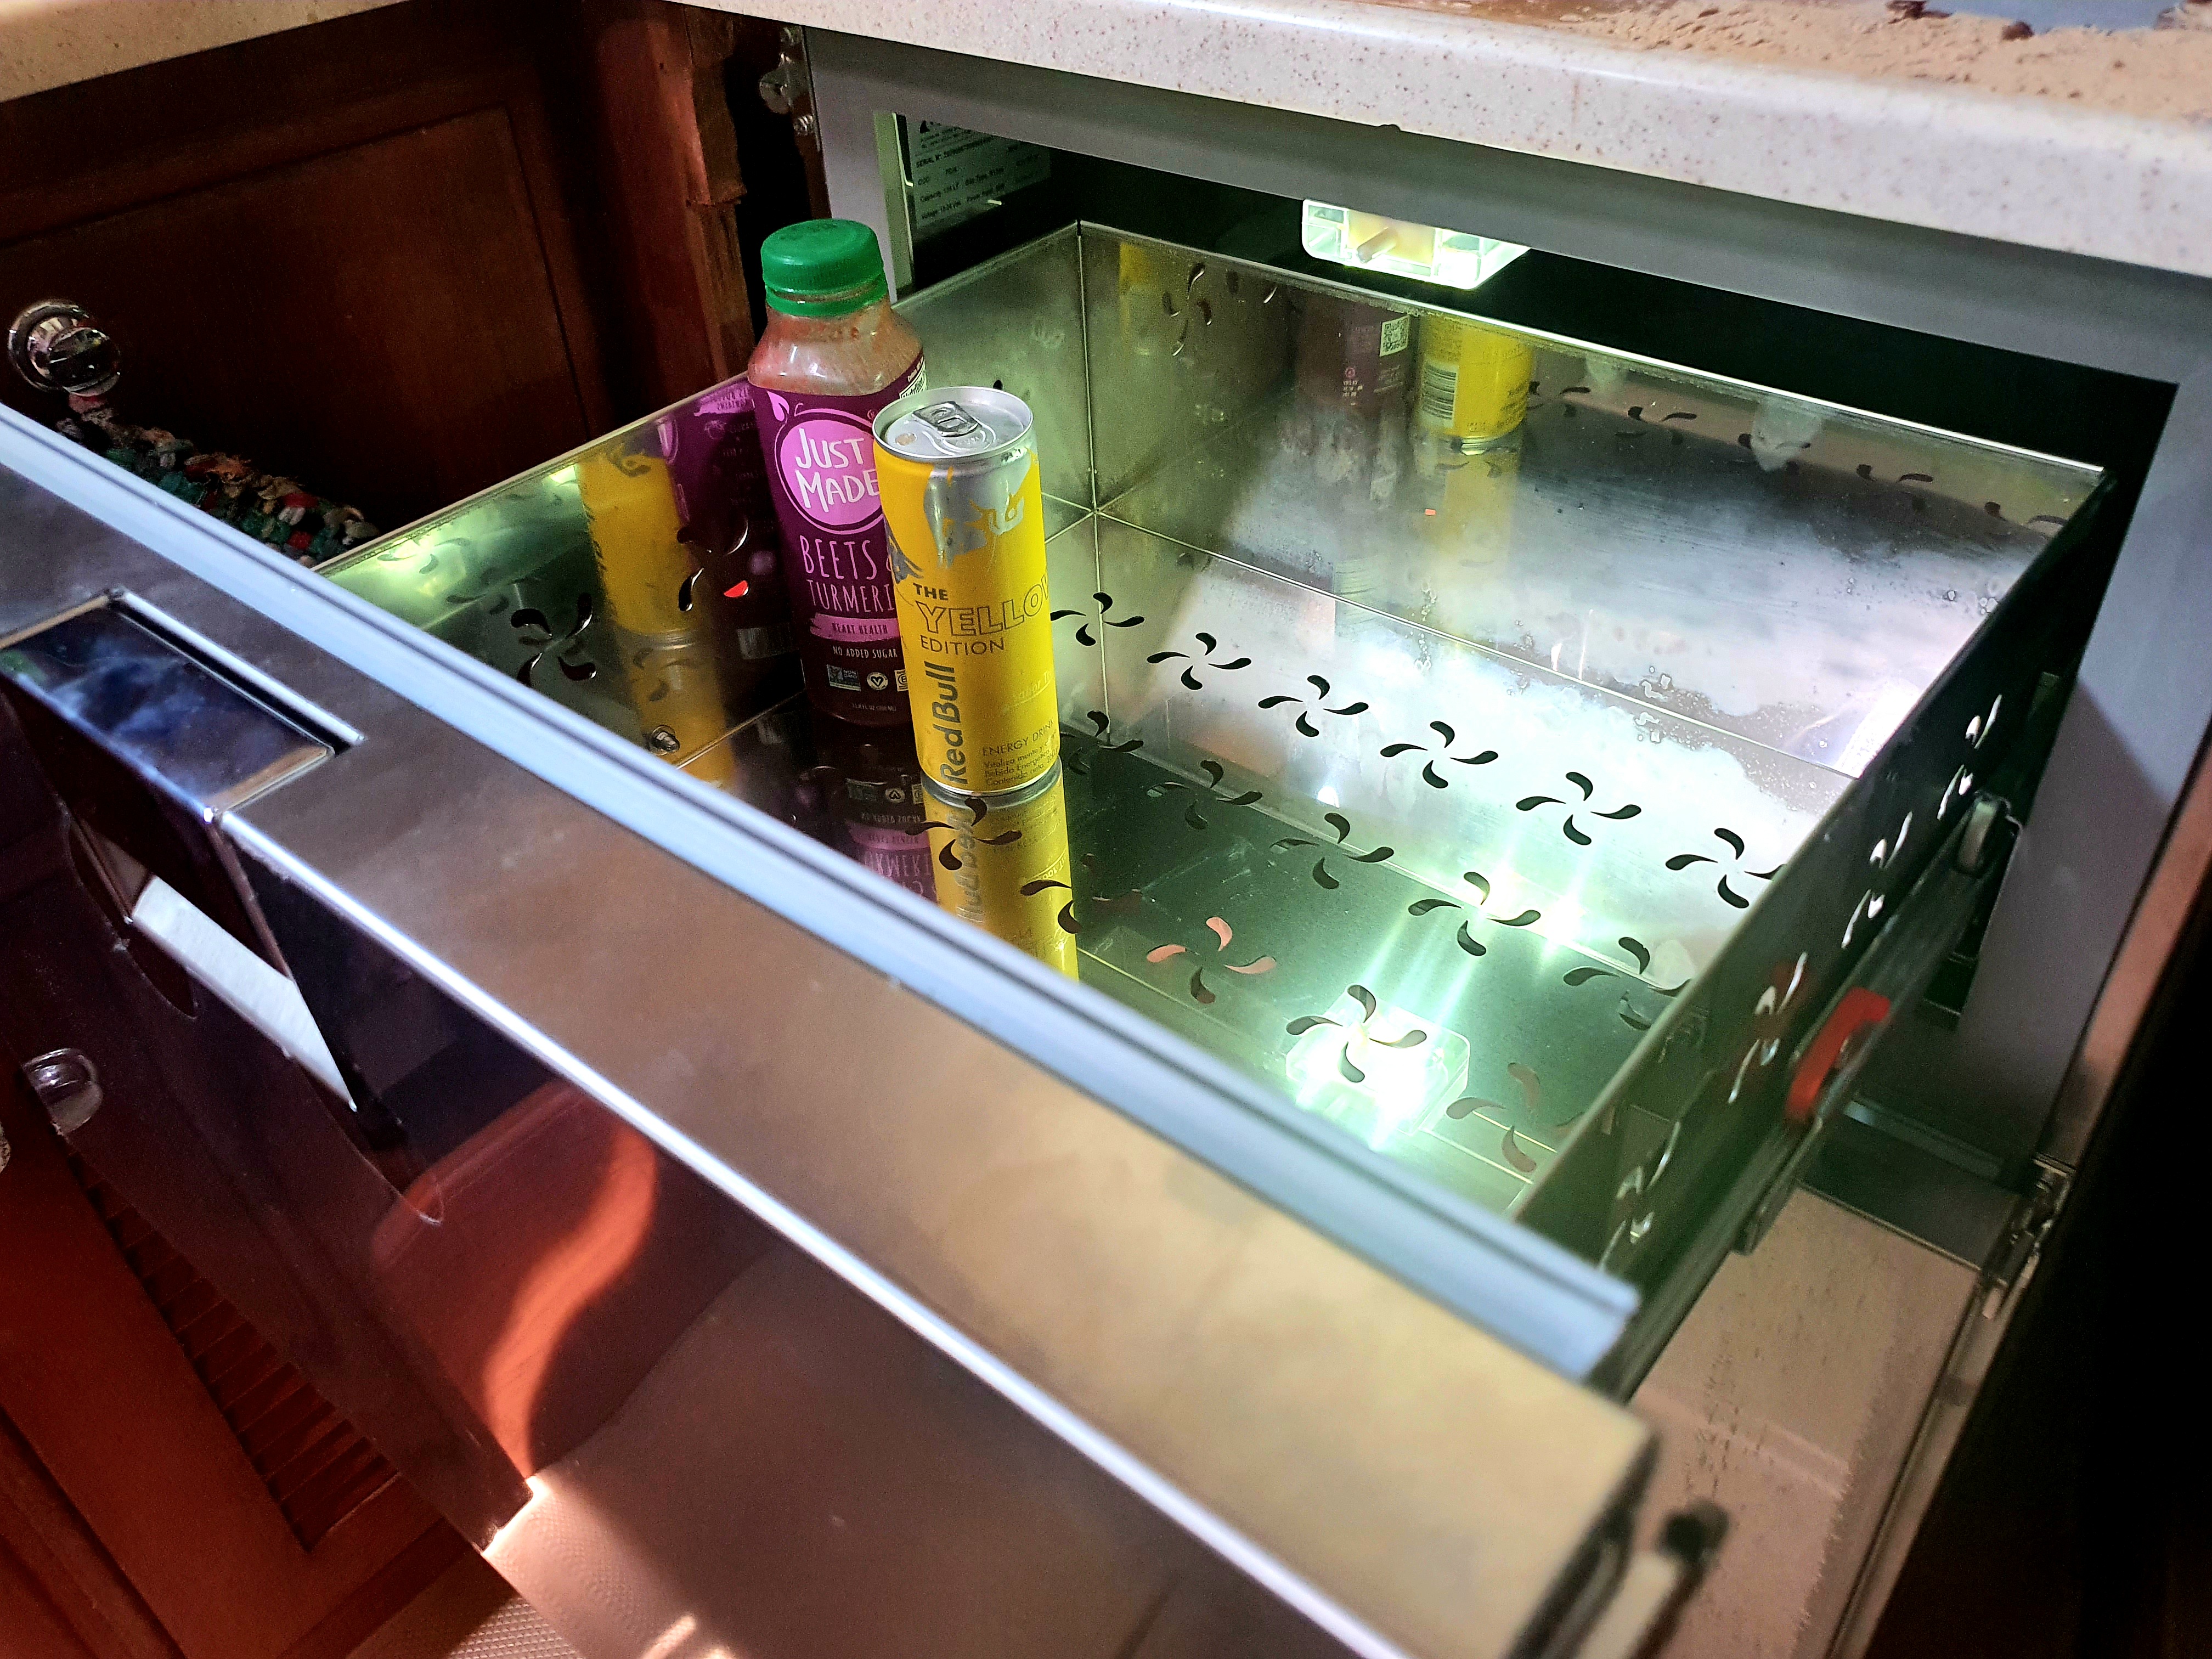

Too bad we hadn’t thought to bring a bottle of champagne because we had been waiting to revel in this project’s completion for months. Lucky for us there are many, many upcoming projects that will also warrant celebration, and we will be certain to keep that lower drawer well stocked.


OMG – what a spectacular…adventure? I cannot even imagine. Really impressive – you got it all fixed and I think I need a glass of wine in honor of your work – cheers to both of you! Big hugs!
Thanks, Kim…Cheers!!!
Only a little of the middle with all the demolition details was boring, but the descriptive amusing way you wrote it is wonderful my talented daughter. 👏🤟
Holy crap that looked like a lot of work! But wow, that’s waaaaay better than the old one! Nice work!
Fantastic detailed article, Thank you for sharing. Julie and I own Catharpin Blue, She is an Island packet 420 hull# 62. After probing around the built-in freezer/refer I have (Thankfully)found no signs of the major condensation issue you have delt with.
We live aboard in Washington state but our boat has spent most of its fabulous life on the east coast and South pacific so I would expect similar condensation.
Do you think it’s possible that it was a sealing or design flaw from the factory that caused this? I just discovered your blog and absolutely love reading about your projects and adventures. Keep up the great work. NOW FOLLOWING.
Kevin and Julie
So Catharpin Blue
Thanks, Kevin. We are very pleased with the results. After a couple of month, though, we are noticing a little bit of moisture below the fridge. Nothing like before, but there is likely another source causing it. Thanks for following. Happy sailing!!
I’m impressed with the creativity! A great reminder that following a dream takes work; sometimes dirty work.
Fair winds and following seas…
Joe
Thanks, Joe. Keeping a cruising boat running is definitely work, but worth the effort.